Plinth area and carpet area of a building is measured for estimation and calculation of building cost. It is also a measure of usable space of building.
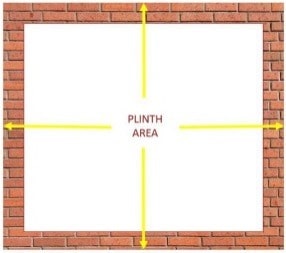
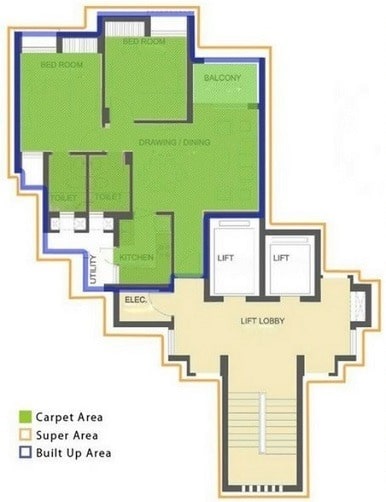
Plinth area is the covered built-up area measured at the floor level of any storey or at the floor level of the basement. Plinth area is also called as built-up area and is the entire area occupied by the building including internal and external walls. Plinth area is generally 10-20% more than carpet area.

Fig.1: Plinth Area of a Room in Building
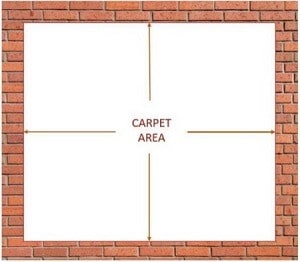
Carpet area the covered area of the usable spaces of rooms at any floor. It is measured between walls to walls within the building and is the sum of the actual areas of the rooms where you can carpet.

Fig.1: Carpet Area of a Room in Building
Measurement of Plinth Area and Carpet Area of a Building
For measurement, the lengths and widths should be measured nearest to 0.01m and areas should be rounded to 0.01 m2. In Case of feet system, length should be measured to nearest 1 inch.
During the measurement, following categories are measured separately:
- Basement
- Floor without cladding (stilled floor)
- Floors including top floor which may be partly covered
- Garage
- Mezzanine floor
Measurement of Plinth Area
Following areas are included during measurement of plinth area:
- Area of the wall at the floor level, excluding plinth offsets. If there are any common walls between two buildings, half of the area of such walls shall be considered in the plinth area. When building consists of columns projecting beyond the cladding, the plinth area is measured upto the external face of the cladding (in case of corrugated sheet, cladding outer edge of the corrugation is considered).
- Areas of the internal shaft for sanitary installations and garbage chute, electrical, telecom and firefighting services provided these do not exceed 2 m2 in area.
- Vertical duct for air conditioning and lift well including landing.
- Staircase room or head room other than terrace level
- Machine room
- Porch
- Open projections of veranda, balconies and parapets, if the area is protected by projections, full area is included in plinth area, if the area is un-protected by projections, 50% of the area is included.
- Recess by cantilevering beyond external walls, bay window is the best example. If the recess height is up to 1.0 meter, 25% of such area shall be included. If the recess height is 1.0 to 2.0 meters, 50% of such area shall be included. If the recess height is above 2.0 meters, 100% of such area shall be included.
The following is not to be included in the calculation of plinth area:
- Additional floor for seating in assembly buildings, theatres, auditoriums
- Cantilevered porch
- Balcony
- Area of loft
- Internal sanitary shaft and garbage chute, provided these are more than 2 m2 in area
- Area of architectural band, cornice, etc.
- Area of vertical sun breaker or box louver projecting out and other architectural features such as slab projection for keeping flower pots
- Open platform
- Terrace at first floor
- Spiral staircase including landing
- Towers, turrets, domes projecting above the terrace level at terrace.
Wall Area in Plinth Area Calculation
Wall area is also included in plinth area calculation. Wall area is the area on plan occupied by walls on any particular floor. It includes the thickness of any finishing or dado tiles if the height of such wall is more than 1m from floor finish.
Following should be included in wall area of the building:
- Area on plan occupied by doors and other openings
- Intermediate pillars, supports and other such obstructions within the plinth area irrespective of their locations
- Pilasters along wall if exceeding 300 cm2 in area
- Flues within the wall
- Built-in cupboards, wardrobes, shelves appearing within a height of 2.2m from floor
- Fire place projecting beyond the face of wall in living or bed room
The following is not included in wall area:
1. Pilaster along wall not exceeding 300 cm2 in are
2. Platforms projecting beyond the face of the wall
Measurement of the Carpet Area of the Building
Carpet area is the plinth area less the area of the following portions of the building:
- Wall area
- Veranda
- Corridor and passage
- Entrance hall and porch
- Staircase and stair cover
- Lift shaft and machine room for lift
- Bathroom and lavatory
- Kitchen and pantry
- Store
- Canteen
- Air conditioning duct and plant room
- Shaft for sanitary piping
- Stilted floor and garage

For the calculation of approximate cost of the building using plinth area method, the sum of the built-up area of all floors including based basement is considered as the plinth area of the building.


